
Home >>RC Airplane DIY Technology Article
How to assembly Freewing F-14 V2 Tomcat Twin 64mm EDF Jet Step by step
Step by Step Assembly Guide: How to assembly Freewing F-14 V2 Tomcat Twin 64mm EDF Jet Step by step
Freewing F-14 V2 Twin 64mm EDF Tomcat �C Full Assembly Guide
This is the PNP / ARF+ V2 (FJ114) swing-wing F-14. Most electronics (dual 64mm EDF, servos, retracts, dual 60A ESC, integrated gyro flight controller) are factory pre-installed.
Required equipment (not included): 7�C9ch transmitter/receiver, 6S 22.2V 4000�C5000mAh LiPo (EC5 plug); 9 channels needed if you use thrust reverse + gyro mode. Tools: 1.5mm / 2.0mm Phillips screwdriver, small pliers, foam-safe CA, tape, servo tester recommended.
1. Pre-Assembly Prep
- Unpack all parts onto a clean soft mat; inspect fuselage, wings, stabilators, plastic scale parts for shipping cracks.
- Cross-check contents against the official parts list.
- Read the official PDF manual first: https://www.freewing-model.com/download/freewing-f-14-tomcat-twin-v2-64mm-edf-jet-manual.pdf
- Keep all wiring connectors protected; avoid pulling servo wires hard.
2. Install Full-Flying Horizontal Stabilators (Elevators)
- Locate the two horizontal stabilator shafts at rear fuselage.
- Route servo wires neatly into fuselage cable channels.
- Slide stabilators onto the rotating shafts; fit retaining rings.
- Secure the shaft lock screws (do not over-tighten��only engage the shaft notch; binding will break servos).
- Attach pushrods between stabilator horns and factory-installed 17g servos.
- Power on later to verify smooth, free movement with no binding.
3. Swing Main Wing Installation �C Most Critical Step
?? Never force fit the swing-wing pivot; forcing cracks EPO foam or damages swing servo gears.
- Insert left main wing onto the fuselage metal pivot shaft. Place the thin adjustment shim between wing and fuselage bearing.
- Align wing perpendicular to the pivot shaft; press down slowly. If stuck, remove and realign.
- Fit the metal locking bracket onto the pivot shaft; thread on the nut loosely first.
- Line up bracket holes with internal support rod, tighten the nut, then lock with M3��7mm locking screw.
- Repeat for the right wing.
- Connect all wing harnesses:
- Wing sweep servo
- Aileron + flap servo leads
- Wing LED light plug Route cables into designated troughs; use the white plastic cable clips to prevent pinching when wings sweep.
V2 upgrade note: The flight board automatically locks wing sweep when flaps are deployed (anti-crash safety feature).
4. Landing Gear Check (Factory Pre-Fitted)
- Cycle gear manually by powering the plane (low power test first).
- Check all gear doors open/close smoothly.
- Confirm nose gear door servo does not bind at full retract/extend.
- Adjust linkages if doors do not fully close against fuselage.
5. Fuselage Electronics & Receiver Installation
- Open the battery hatch under fuselage to access the integrated multi-function flight control board (with gyro).
- Plug your receiver into the designated receiver port on the control board.
- Double-check:
- Twin ESC power harnesses pre-connected to flight board
- All servo leads from wings/stabs plugged into correct board headers
- Mount receiver securely with foam tape away from ESC power wires (reduce interference).
- Leave battery bay unobstructed for airflow; secure loose wires with tape.
6. Scale Accessories Fitting
- Magnetic nose cone: Simply push into front fuselage (magnet holds; removable for transport).
- Cockpit canopy: Clip or lightly tack with tiny CA drops (avoid glue overflow on foam).
- Missile/pylon hardpoints: Screw missile mounts under wings, slide ordnance clips into slots.
- Fit pitot tube, antennas, small fairings with tiny amounts of foam-safe CA.
7. First Power-On & Radio Setup (Do This Before Closing Wing Covers!)
- Transmitter: Set all trims to zero; use a 9ch radio if activating thrust reverse.
- Connect 6S LiPo (stand clear of EDF fans!).
- Let flight board complete gyro initialization (do not move jet during startup).
- Test all surfaces in order and confirm direction matches manual:
- Ailerons
- Full-flying stabilators (elevator)
- Rudder
- Flaps (up/down)
- Landing gear up/down
- Wing sweep (forward / swept back)
- LED navigation lights
- Reverse channels in your radio if any surface moves backwards.
- Test EDF motors slowly at low throttle; confirm both spool up evenly, no unusual noise.
- If equipped: Test thrust reversing function.
8. Center of Gravity (CG �C V2 Marked on Fuselage)
? Official CG mark is printed on fuselage (not on moving wings for V2)
- Balance plane with wings in fully forward (unswept) position.
- Place balance finger at CG line; nose slightly heavy is safer for maiden.
- Shift LiPo forward/back inside battery bay to adjust balance.
Do NOT balance with wings swept back �C CG position changes drastically!
9. Final Assembly & Pre-Flight Check
- Once all functions test perfectly: Install the main wing upper cover panels with supplied screws.
- Re-tighten all pivot and linkage screws gently (no over-torque).
- Check every cable cannot be pinched when wings sweep fully forward and fully aft.
- Do a full range test with transmitter.
Critical Build Warnings & Common Mistakes
- Swing-wing binding = #1 failure cause: If wing sticks during sweep, loosen pivot nut and re-shim. Sweep must move freely by hand when servos are off.
- Avoid excessive CA glue on EPO foam; use accelerator sparingly.
- Always disconnect LiPo when adjusting linkages.
- Never run EDF fans without full ducting; risk of motor overheat.
- Maiden flight: Use flaps for takeoff; avoid sweeping wings at low speed until comfortable.
Supplementary Resources
- Official build video (Motion RC): Assembling the Freewing F-14 Tomcat Twin 64mm EDF Jet (YouTube)
- Official manual PDF link listed above for labelled wiring diagrams and screw sizes.
Freewing F-14 V2 64mm Twin EDF �C Transmitter Channel Assignment
Flight Controller built-in (Freewing original FC board) Radio requirement: Minimum 7CH, recommended 9CH for full features (Gyro gain + Thrust Reverse) Default FC wiring mapping (Direct follow):
| Channel | Function | Suggested Switch / Knob | Notes |
|---|---|---|---|
| CH1 | Aileron | Right stick horizontal | Wing unswept / swept both active |
| CH2 | Elevator | Right stick vertical | Full-flying horizontal stabilators |
| CH3 | Throttle | Left stick vertical | Dual EDF main power |
| CH4 | Rudder | Left stick horizontal | Vertical tail |
| CH5 | Landing Gear | 3-pos switch (SWC / SWD) | Up / Down |
| CH6 | Flaps | 3-position switch (SWB) | Position 0: Flaps Up Position 1: Flaps Mid Position 2: Full Flaps ?? FC auto-lock wing sweep when flaps deployed |
| CH7 | Wing Sweep | 2-position switch (SWA) | Position 0: Wings Forward Position 1: Wings Swept Back |
Recommended Switch Layout (Futaba / Radiomaster / FrSky Mode 2)
Universal standard layout most F-14 pilots use
- SWA (2-pos): Wing Sweep
- SWB (3-pos): Flaps
- SWC (3-pos): Landing Gear
- SWD (2-pos): Gyro On/Off
- Rotary Knob (VR): Gyro sensitivity gain
Important FC Logic Rules (V2 Built-in Flight Board)
-
Flaps deployed �� Wing sweep SERVO LOCKED You cannot sweep wings when flaps are extended. This is factory safety programming, cannot be disabled. ?? Flight tip: Retract flaps first before sweeping wings back at high speed.
-
Gyro Modes
- Gyro Low Gain: Takeoff & landing
- Gyro Medium: General flight (unswept wings)
- Gyro High Gain: Swept back high-speed flight
Suggestion: Do NOT run max gyro gain on maiden flight.
- Thrust Reverse setup Only activate reverse at low throttle! If you enable reverse at high throttle you can damage EDF fans. Program throttle cut safety if your radio supports it.
Radio Program Tips (Critical!)
1. Travel Adjust (Endpoint)
- Wing sweep servo: Do NOT max endpoints! If sweep hits hard stop, gears strip. Set travel until wing fully forward & fully aft without mechanical binding. Move wing by hand, confirm free movement at both limits.
2. Servo Reverse Checklist (Test after power on)
Power aircraft, keep clear of fans, check each surface:
- Aileron: Stick right �� right aileron up
- Elevator: Stick back �� stabilators tilt up
- Rudder: Stick left �� tail rudder left
- Flaps: Flap switch down �� flaps drop down
- Wing sweep: Switch activate �� wings move backward
3. Mixer Suggestions (Optional, highly recommended for F-14)
-
Elevator to Flap Mix (Flap-to-Elevator Compensation) When deploying flaps, jet naturally pitches up. Program small elevator down mixing when flaps extend to counteract pitch change. Example values for reference: Flap mid: Elevator -3% Full flap: Elevator -6% Adjust in air on first test flight.
-
Wing Sweep Elevator Mix (Very useful!) When sweeping wings back, aircraft pitch tendency changes. Add small elevator trim mix tied to sweep switch for smoother transition.
Maiden Flight Radio Settings Quick Reference
- Gyro: Medium gain
- Flap setting: Use mid-flap for takeoff
- Takeoff: Wings forward
- Do NOT sweep wings below 60% throttle on first flight
- Test wing sweep transition at medium altitude first
Bonus: Warning if you use non-Freewing FC
This channel map only works with the stock integrated Freewing F-14 V2 flight controller.
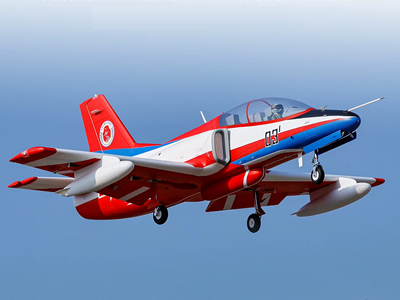
Freewing K-8 Karakorum 80mm EDF PNP Jet
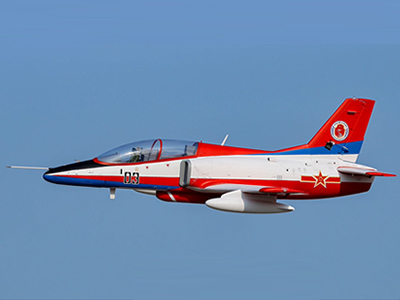
Freewing K-8 Karakorum 70mm EDF PNP Jet
3.Freewing F-35 110mm EDF jet
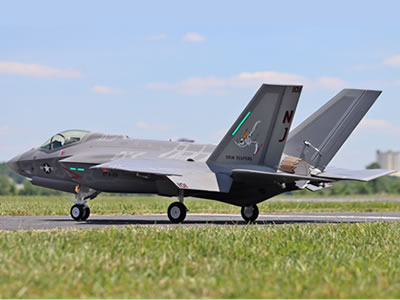
Freewing F-35C 110mm EDF Lightning II Super Scale Jet with Gyro RC Airplane

