
unboxing Review freewing f-35c 110mm edf jet from sales manager Xie zhao Ting,freewing model store.
Written by Mr Xie (general manager of Freewing Model company)
the first Airliner Airplane in a scale model manufacturer
Product review
As seen in the in August,2th 2026 In China
Dear Friend:
\Basic Overview
This is Freewing’s brand-new flagship large-scale carrier variant F-35C, 1/9.6 scale, the biggest EDF jet Freewing has released. Built with reinforced EPO foam + carbon fiber reinforcement, officially Lockheed Martin licensed.
Key Specs
- Wingspan: 1340 mm
- Fuselage length: 1618 mm
- Empty weight (PNP, no battery): ~5200 g
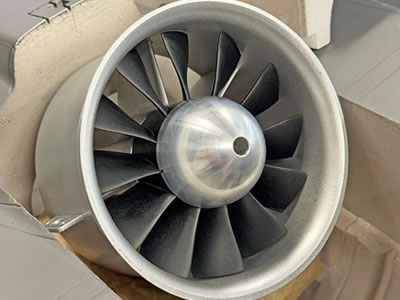
- Power: 110mm 12-blade EDF, 4678-680KV inrunner motor + 130A ESC
- Power requirement: 12S LiPo (2×6S EC5 battery)
- Radio: Minimum 6-channel radio; 7ch for reverse thrust, 9ch to run formation lights
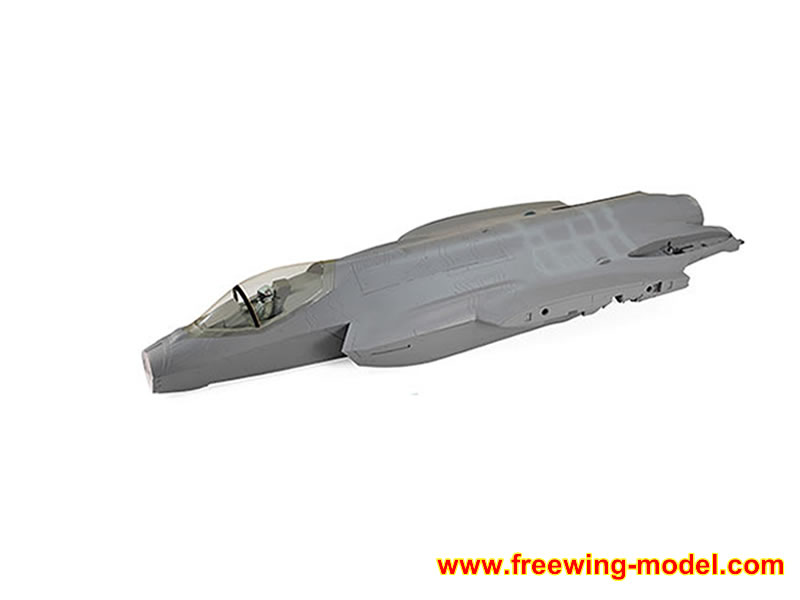
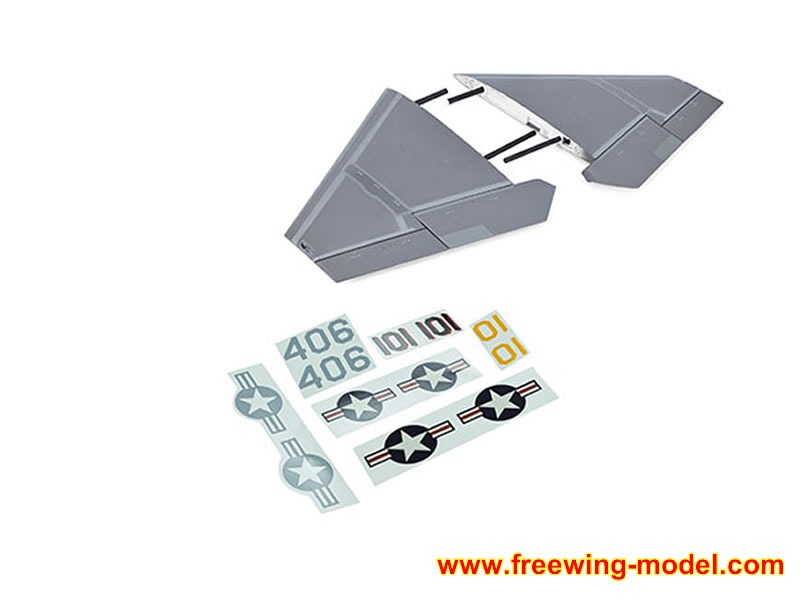
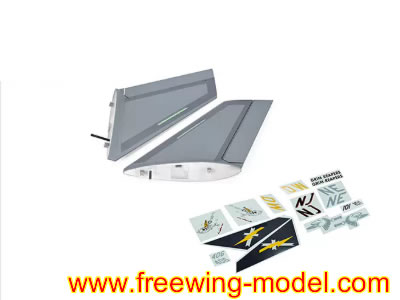
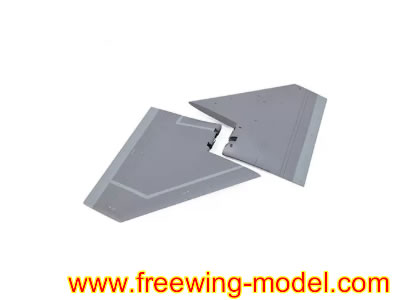
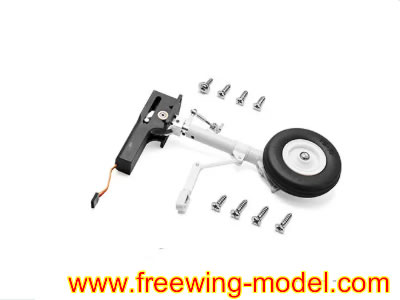
1. Box & Packaging
- Giant reinforced carton with custom foam cutouts to protect fuselage, separate wings, stabilizers and landing gear.
- All fragile parts (nose, pitot, antennas) packed individually.
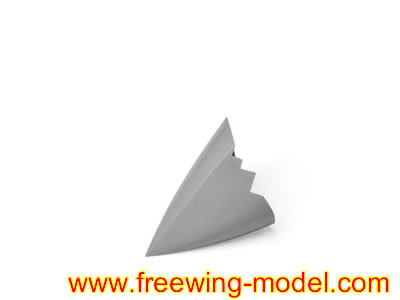
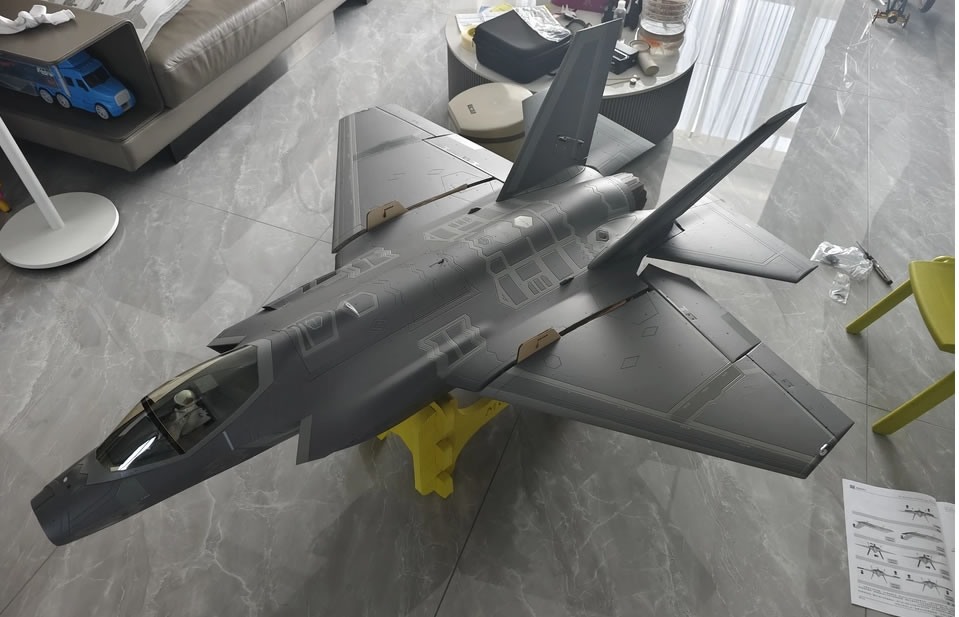
- Components split into main fuselage, port/starboard main wings, horizontal stabilizers, vertical fins, landing gear set, scale accessories.
2. What’s inside the box (PNP Gyro Version)
✅ Pre-assembled main fuselage

- Factory fitted 6-axis EG01 flight stabilizer gyro
- Fully installed 110mm EDF power system (motor, fan, 130A ESC)
- Pre-wired digital metal gear servos for all control surfaces
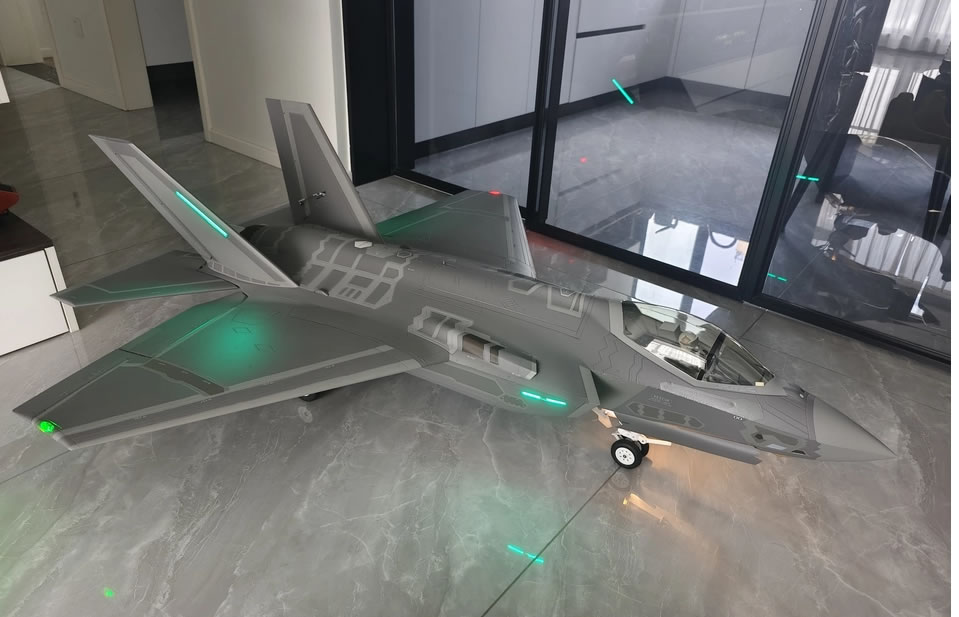
- Built-in afterburner LED exhaust lighting
- Complete navigation & formation LED lights
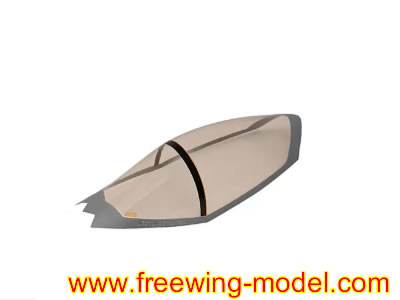
- Detailed cockpit with painted pilot figure
- Large battery bay for dual 6S packs
✅ Plug-and-play removable assemblies
- Pair of F-35C enlarged carrier-compatible main wings (quick plug-in, no glue required for field assembly)
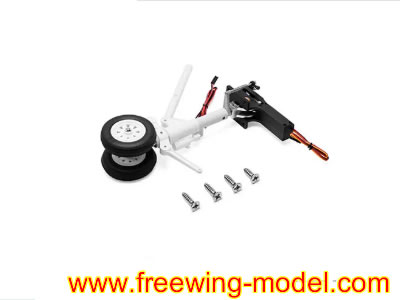
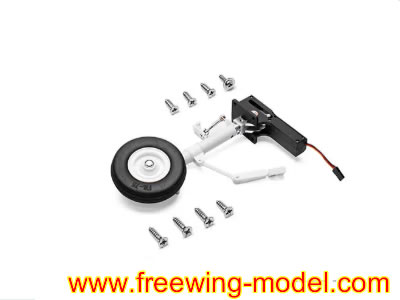
- Horizontal stabilizers + twin vertical stabilizers ✅ CNC machined shock-absorbing retractable landing gear (main + nose gear with steering) ✅ Scale accessories
- Ordnance pylons & dummy missile sets
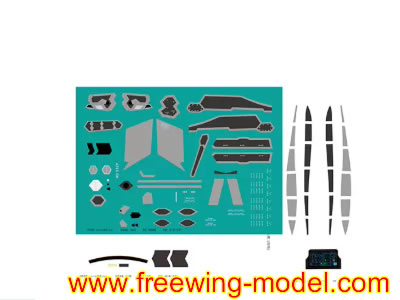
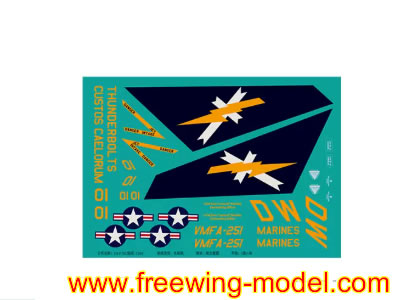
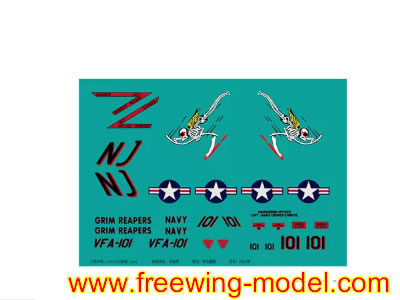
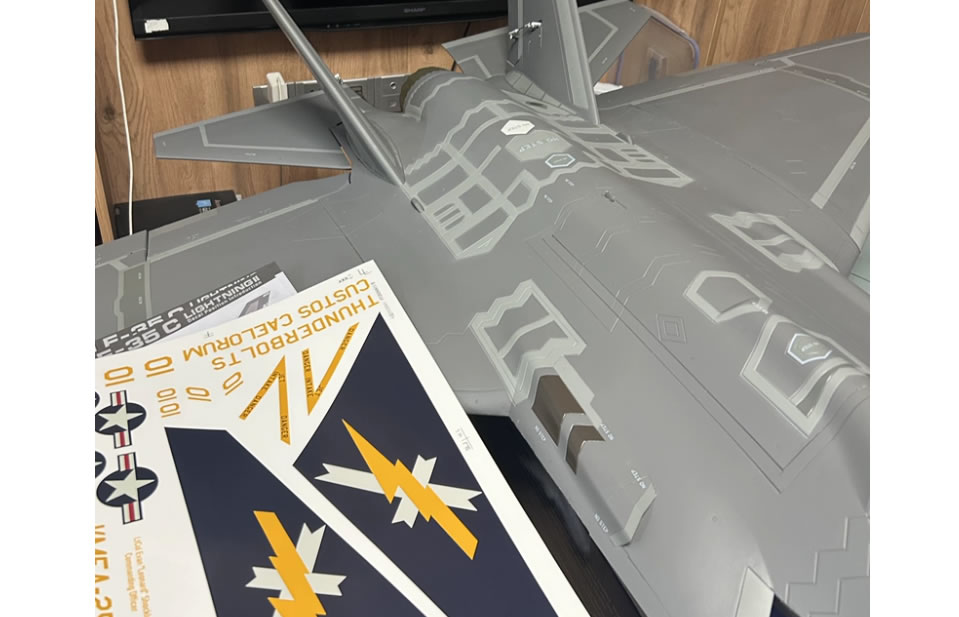
- Decal sheets, antenna parts, pitot tube
- User manual, servo center guide, spare hardware
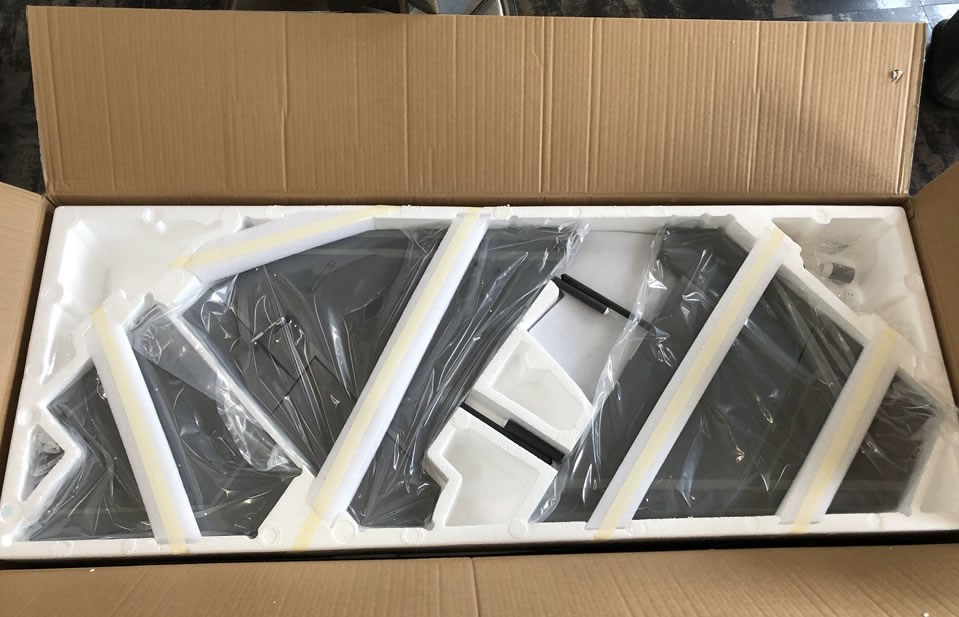
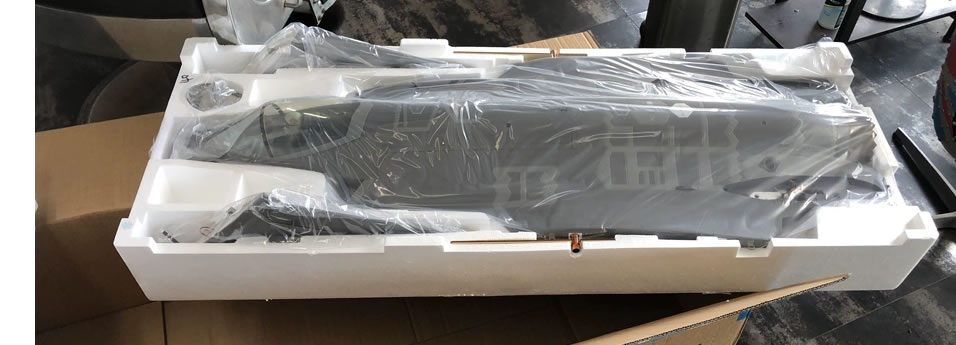
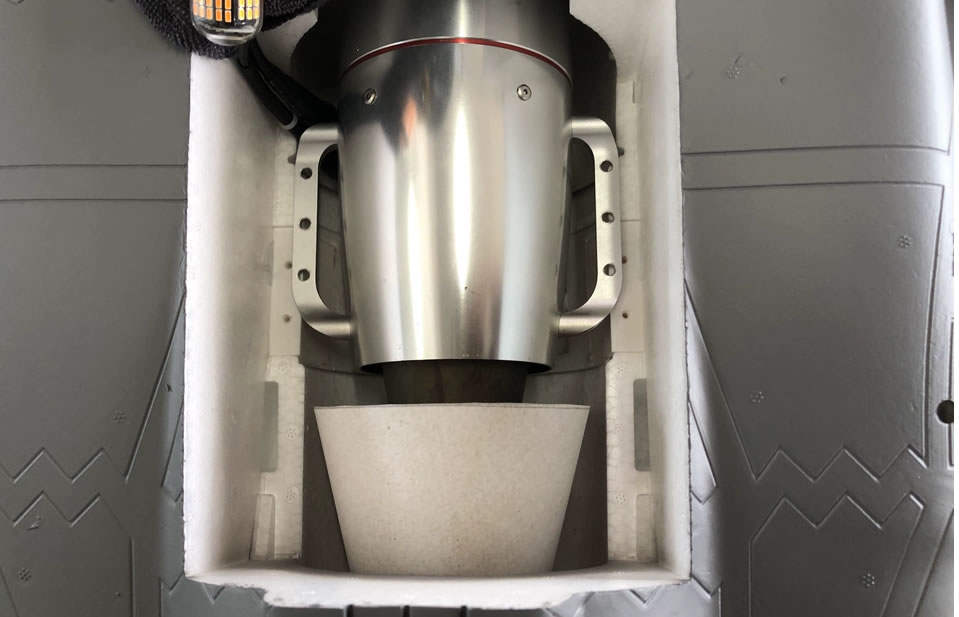
❗ Not included: Transmitter, receiver, 12S LiPo batteries, charger
3. Unbox Inspection Checklist (Critical!)
- Check EPO foam for shipping cracks, dents on intake lips and fuselage edges
- Manually cycle retracts: confirm smooth extension/retraction, no binding
- Turn fan by hand – ensure no rubbing between fan blades and shroud
- Check all control surfaces: ailerons, elevators, rudders have free travel
- Test LED lighting harness connections
- Verify all servo linkages are secured
4. Assembly Steps (Field setup ~15–20 mins)
- Mount vertical & horizontal stabilizers, lock quick connectors
- Plug in both main wings (secure wing lock pins)
- Install pitot tube, small scale antennas
- Fit optional ordnance/missiles
- Route battery wires, load dual 6S EC5 batteries
- Bind receiver, calibrate ESC, set gyro modes, trim control surfaces
- Confirm CG position (follow manual marked datum)
5. Flight Notes
- Flight duration: ~3.5–4 minutes on two 6S 6000mAh LiPo
- Powerful static thrust; requires large paved runway for takeoff & arrested-style landing
- Gyro can be toggled between stabilize/off modes for aerobatic or scale flight
- Reverse thrust available for shorter landings (requires 7+ channel radio)
6. Common Unbox & Setup Pitfalls
- Do NOT run the EDF fan without cowling/intake; risk blade damage
- Double-check EC5 connector polarity before power-up
- Secure battery with straps – high throttle creates strong vibration
- Retract servo loads are heavy; avoid operating retracts at full throttle statically
YouTube Unboxing Script: Freewing F-35C 110mm EDF Jet
Video Style: RC Plane Hobby Unbox | Casual, Cinematic, Hobby-Focused
Runtime target: 7–9 minutes
Format: Voiceover + on-camera dialogue + shot list + on-screen text prompts
Intro (0:00–0:45 | Opening Shots)
[Visual Shot List]
- Wide shot: Giant shipping box on workbench, camera slowly push in
- Close-up: Freewing branding, Lockheed Martin official licensed marking
- On camera: You lean into frame, hold box edge Voice / On-Camera Script “What’s up everyone, welcome back to the channel. Today is the big day. We’re unboxing the highly anticipated Freewing F-35C Lightning II, the 110mm 12-blade EDF carrier variant jet. This is Freewing’s largest foam EDF jet to date, 12S power, built-in gyro, full retracts, scale lighting. Let’s crack open this massive box and see what’s inside.” On-screen text: Freewing F-35C 110mm EDF | Licensed F-35C Lightning II
Segment 1: Unpacking the Box (0:45–2:15)
[Visual Shot List]
- Shot: Cutting packing tape, lift box lid
- Slow pan over custom foam cradle
- Close-ups: Separated fuselage, wings, stabilizers, landing gear
- Pull each main component out one by one, lay neatly on bench Script “Just look at this custom foam packaging, built to protect every part during shipping. Starting with the main fuselage – this is the heart of the jet. All the wiring, servos, the massive 110mm EDF unit, LED lighting and factory gyro are already pre-installed. We have the plug-and-play main wings, horizontal stabilizers, twin vertical fins, and a complete set of CNC shock-absorbing retractable landing gear. Everything is segmented for transport, no permanent glue needed for assembly.” On-screen text: EPO Reinforced Foam • Quick Plug-In Assembly
Segment 2: Walkthrough Every Component (2:15–4:30)
[Visual Shot List]
- Close-up: Fuselage intake, exhaust afterburner LED
- Hand slowly spin EDF fan – check for rub
- Show cockpit with pilot figure
- Lift wings, display enlarged F-35C carrier wing design
- Show retract set, steerable nose gear
- Lay out missiles, pylons, pitot tube, spare parts Script “Let’s go piece by piece. Inside this fuselage sits the 110mm 12-blade EDF, paired with 4678 inrunner motor and factory 130A ESC. This setup runs on dual 6S batteries – 12S total power. You can see the built-in navigation lights and afterburner exhaust LEDs that light up during flight. This is the carrier variant F-35C, so notice the larger wing surface compared to the A/B variants. All control surfaces run digital metal gear servos pre-wired. This PNP version comes with the EG01 six-axis flight stabilizer gyro straight out of the box. Here’s the full retract set with suspension, nose wheel steering. We also get scale accessories: weapon pylons, dummy missiles, pitot tube, decals and all small hardware.” On-screen text: 110mm 12-Blade EDF | 12S LiPo | Built-In 6-Axis Gyro
Segment 3: Important Pre-Flight Unbox Inspection Checklist (4:30–5:45)
[Visual Shot List]
- Demonstrate spinning fan to check blade rub
- Cycle retracts manually
- Move all control surfaces to check free movement
- Point out battery compartment Script “Now a critical part for every RC jet unbox – your inspection checklist before assembly. First: spin the EDF fan by hand. Make sure there is zero rubbing between blades and shroud. Second: test all control surfaces; confirm no binding on ailerons, elevators, rudders. Third: cycle the landing gear. Check for smooth movement, no tight spots. Double check all wiring connectors. This big jet vibrates heavily at full throttle, loose connections equal trouble mid-flight. The battery bay accepts two 6S packs connected in series for 12S power. Remember this model uses EC5 connectors.” On-screen text: Pre-Flight Check List – Fan Rub • Servos • Retracts • Wiring
Segment 4: Assembly Overview & Flight Expectations (5:45–7:00)
[Visual Shot List]
- Quick time-lapse teaser: attaching wings and stabilizers
- Hand gesture showing CG zone marked on fuselage
- Close up of wing lock pins Script “Field assembly is really straightforward, roughly 15–20 minutes. Plug in stabilizers, attach the main wings and lock the pins, install pitot tube and scale ordnance if you want. Make sure you follow the manual strictly for the center of gravity. Wrong CG on a large fast EDF jet leads to unstable flight. Flight times sit around 3.5–4 minutes using dual 6S 6000mAh batteries. This airframe has huge thrust. You need a smooth paved runway for takeoff. If your radio supports it, this jet can run reverse thrust for shorter landings. The built-in gyro can be switched on or off, great whether you want stable scale flight or full aerobatic mode.”
Closing / Outro (7:00–7:45)
[Visual Shot List]
- Wide shot: all jet parts laid out fully
- Teaser shot: future build video / maiden flight preview
- Camera pull back, your on-camera shot Script “That wraps up our unboxing of the Freewing F-35C 110mm EDF jet. This is an impressive large-scale EDF platform straight from the factory. Stay tuned for the full assembly video, setup guide, and eventually the maiden flight. If you enjoyed this unbox hit the like button, subscribe and drop a comment – have you ordered this jet, or are you considering it? Thanks for watching, and I’ll catch you in the next video.” End screen text: Subscribe | Next Video: Assembly & Radio Setup
Extra Creator Extras
- B-Roll Suggestions
- Macro shots of fan blades, carbon fiber reinforcements
- Slow motion sliding camera over fuselage contours
- Close-up of Freewing official logo & licensing decal
Video Length: ~8 minutes | Tone: Enthusiastic RC hobby creator | PNP Gyro Version
Includes: Timestamps, Camera Shots, Voiceover, On-Screen Text, B-Roll tips
00:00 – 00:50 | Opening Hook
Shots
- Cinematic wide shot: Massive shipping box on workbench, slow camera push-in
- Close-up pan over Freewing branding + Lockheed Martin licensed sticker
- Cut to you on camera beside the box
Dialogue
What’s up guys, welcome back to the channel! Today we have one of Freewing’s biggest foam EDF jets – the F-35C Lightning II 110mm EDF. This is the carrier variant, official licensed airframe, 12S power, built-in gyro, full retracts and scale lighting. Let’s tear into this massive box and see everything included.
On screen text: Freewing F-35C Lightning II | 110mm 12-Blade EDF
00:50 – 02:20 | Opening the Box & Overview
Shots
- Cutting packing tape, lift box lid
- Slow pan across custom cut protective foam
- Pull main fuselage out slowly, place on bench
- Lay out all separate components one by one
Dialogue
Just look at this packaging. Custom foam cradles protect every component during transit.
Inside we get the pre-built main fuselage, plug-in wings, horizontal and vertical stabilizers, complete retractable landing gear set, plus all scale accessories. Best part: most electronics are pre-installed from factory, no tedious wiring work.
On screen text: Reinforced EPO Foam | Quick Field Assembly
02:20 – 04:40 | Component Deep Dive
Shots
- Close shot of intake ducts & afterburner LED
- Hand spin the 110mm EDF fan slowly
- Show cockpit with detailed pilot figure
- Compare wider F-35C carrier wings
- Close up CNC suspension retracts + steerable nose gear
- Lay out pylons, dummy missiles, pitot tube, hardware bag
Dialogue
Let’s break down the hardware.
Power system: 110mm 12-blade EDF paired with 4678 inrunner motor and factory 130A ESC. This jet runs on two 6S batteries in series – 12S total.
We have navigation lights and glowing afterburner LED for night flying. This is the F-35C, so these wings are noticeably larger than F-35A/B variants, built for carrier operations.
All control surfaces use pre-wired digital metal servos. This PNP model comes pre-fitted with the EG01 six-axis stabilization gyro.
Here’s the full shock absorbing retract set with nose wheel steering. Also included are weapon pylons, dummy ordnance, pitot tube and spare small parts.
On screen text: 12S LiPo • Built-in 6-Axis Gyro • Full Retracts
04:40 – 05:55 | Critical Unbox Inspection Checklist
Shots
- Demonstrate checking fan for rubbing
- Cycle landing gear
- Move all control surfaces to check binding
- Show internal battery compartment
Dialogue
Now this part is super important for any large EDF jet – your post-unbox inspection.
First, spin the fan by hand, confirm zero blade rub against the shroud.
Second, test all control surfaces; make sure ailerons, elevators and rudders move freely.
Third, cycle the retracts, watch for sticking or binding.
Check all wiring connectors. This jet creates massive vibration at full throttle, loose plugs can cause in-flight failures.
The battery bay fits two 6S packs connected in series, it uses EC5 connectors, double check polarity before powering up!
On screen text: PRE-FLIGHT CHECKLIST ✅ Fan Rub ✅ Servos ✅ Retracts ✅ Wiring
05:55 – 07:10 | Assembly & Flight Expectations
Shots
- Quick teaser timelapse: attaching wings and fins
- Point to CG marking on fuselage
- Close up wing locking pins
Dialogue
Field assembly takes roughly 15–20 minutes. Attach stabilizers, plug in main wings and lock the pins, mount pitot tube and missiles if you want scale looks.
Always follow the manual for CG location. Improper balance on a fast heavy jet equals disaster.
Flight times are around 3.5–4 minutes with dual 6S 6000mAh batteries. This airframe has incredible thrust, you need smooth paved runway for takeoff.
If your transmitter has 7 or more channels, you can utilize reverse thrust to shorten landing rolls. The onboard gyro can be toggled on or off, perfect for scale cruising or aerobatics.
07:10 – 08:00 | Outro & Teaser
Shots
Wide overhead shot with all components laid out neatly
Teaser static shot of fully assembled render / preview photo
Cut back to you on camera
Dialogue
That’s our complete unbox of the Freewing F-35C 110mm EDF jet. This is one serious large-scale RC warbird.
Stay tuned for my upcoming radio setup tutorial, assembly video, and of course the maiden flight.
If you enjoyed this video smash the like button, subscribe, and drop a comment down below. Are you picking up this F-35C, or considering another Freewing jet?
Thanks for watching, and I will see you in the next video.
Bonus Creator Tips
Thumbnail Concept
Fuselage emerging from the shipping box, bold white text: FREEWING F-35C 110MM EDF UNBOXING
B-Roll Footage Ideas
- Macro close up of EDF fan blades
- Slow slide camera following fuselage contours
- Close shot of Lockheed Martin official license marking
- Static shot of LED afterburner lighting powered up
Optional Ad-Lib Lines you can insert
- “This is currently Freewing’s largest production EDF foam jet.”
- “Make sure you don’t run the fan without the intake cowling, you risk damaging blades.”
- “Avoid cycling retracts at full throttle on the ground to reduce servo stress.”
Freewing F-35C 110mm EDF – Assembly Tips & Common Pitfalls
Target model: PNP EG01 Gyro version
Important: This is a heavy, high-speed 12S jet. Small assembly mistakes = major flight risk.
1. Pre-Assembly Prep (Before installing any parts)
- Full unbox inspection FIRST
- Spin the 110mm fan by hand; confirm zero blade-to-shroud rub. If rubbing exists, loosen fan mount screws and re-center the EDF unit.
- Actuate all control surfaces manually, check for foam binding.
- Cycle retracts multiple times; listen for grinding or tight spots.
- Check all wiring harnesses for cuts or loose factory connectors.
- Test electronics dry (no prop/fan running)
Plug in receiver, power system on a bench.
- Verify all servos respond correctly.
- Test retract up/down sequence.
- Confirm navigation lights + afterburner LED work.
- Confirm gyro powers on and initializes.
⚠️ Do NOT power up the EDF motor during bench testing unless you have safety barriers.
2. Stabilizer & Fin Installation Tips
- Vertical stabilizers: Do not over-tighten screws! The foam mount can crack. Snug + small drop of medium CA (optional) to prevent screws backing out.
- Horizontal stabilizers: Ensure the wiring plug seats fully. Vibration in flight can pull loose connectors.
- Route stabilizer wires neatly inside fuselage channels; avoid pinching when sliding parts together.
3. Main Wing Installation (Most commonly messed up area)
- Fully seat the wing root plug-in connector before locking the wing retention pin. If you force the pin while the connector is offset, you can bend internal pins.
- Lubricate the plastic locking pin lightly with silicone grease (not oil) for easy removal.
- After locking both wings: gently tug each wing outward to confirm it’s secured.
- Run your fingers along the wing root gap; ensure no wiring gets trapped between wing and fuselage.
4. Landing Gear / Retract Setup
- Never cycle retracts at full throttle on the ground – massive servo load.
- Check steering nose gear free movement; adjust linkage if it binds at full left/right.
- Shock-absorbing struts: Do not overcompress during installation.
- Double-check retract wiring; loose connections cause gear failure mid-flight.
Tip: Add small heat-shrink to retract connectors for vibration resistance.
5. Battery Installation & Wiring (12S = Two 6S in series)
- Required configuration: 2×6S LiPo connected in series (EC5)
- Secure batteries tightly with heavy-duty straps. This jet vibrates violently at high throttle; sliding batteries shift CG mid-flight.
- Leave slight slack on battery leads, but avoid loose wiring that can catch on fan intake.
- Mark battery polarity clearly; reversing EC5 leads will destroy ESC instantly.
- Do not stuff extra wiring inside the battery bay – heat buildup risk.
6. Control Surfaces, Linkages & Radio Setup
- Check all servo arm screws; factory screws can loosen in transit. Use thread locker (blue removable) on all metal servo screws.
- Set servo travel according to manual. Do NOT max out travel; it can stall servos.
- Servo centering: Power radio on before connecting aircraft power (standard safety sequence).
- Gyro setup (EG01)
- Complete gyro calibration on flat, level surface.
- Test gyro gain on ground first; too high gain causes oscillations.
- Assign a switch to toggle gyro ON/OFF if your radio allows.
7. CG – THE MOST CRUCIAL SETUP
- Strictly follow the manual’s marked CG datum line on fuselage.
- This F-35C is nose-heavy OR tail-sensitive if misbalanced.
- Balance jet without batteries first, then load batteries and recheck.
- If tail-heavy: risk unrecoverable pitch-up at high speed.
- If nose-heavy: difficult flare, hard landings, tendency to dive.
8. Scale Accessories (Missiles, Pitot, Antennas)
- Pitot tube is fragile; handle carefully. Mount last to avoid breaking during assembly.
- Dummy missiles add weight! Adding full ordnance shifts CG rearward – re-balance after fitting.
- Thin antenna parts are prone to breaking during transport; consider removing for road travel.
9. Safety & Ground Testing Rules
- Keep intake area clear at all times. Debris sucked into the 110mm fan causes catastrophic damage.
- Avoid running EDF longer than 5–8 seconds during ground checks to prevent ESC overheating.
- Check intake foam lips for cracks; repair small foam cracks with thin CA + foam accelerator.
10. Transport & Field Assembly Pro Tips
- Remove wings, vertical fins, pitot tube when transporting.
- Carry small screwdriver, spare screws, thread locker, tape in your field box.
- Build a simple checklist for field setup: Wings locked → Battery secured → CG check → Control test → Retract test.
Common Assembly Mistakes to Avoid
❌ Over-tightening screws into EPO foam (cracks mounts)
❌ Forgetting to lock wing pins fully
❌ Incorrect series wiring of batteries
❌ Running fan without intake shroud
❌ Ignoring CG after adding missiles
❌ Pinching wiring between fuselage and wings/stabilizers
This Product is available in stock,we will ship the package box within 48 hours after the buyers pay money via paypal.

